
How to Prepare Your Air Conditioner for the First Heat Wave
The first heat wave of the season can push your air conditioner to its limits before you even realize it needs attention. Spring in Kansas often shifts from mild temperatures to sudden high humidity and 90-degree afternoons within days. A neglected cooling system can fail right when you need it most, leaving your home uncomfortable and your family stressed. Preparing your air conditioner now saves money, prevents breakdowns, and extends the life of your equipment. Smart homeowners in Lawrence, Topeka, and Overland Park take time in April and May to inspect and service their units. This guide walks through every step you need to take before the thermometer climbs. A little preparation today prevents emergency calls tomorrow.
How to Inspect Your Air Conditioner Before the First Heat Wave
A thorough inspection is the foundation of a reliable cooling season. Your air conditioner sat idle for months during winter, and dust, debris, and small pests can cause major issues. Walking through a checklist before you crank the system on helps you spot trouble early. Small problems caught in spring rarely turn into expensive summer repairs. The inspection process covers the outdoor condenser, indoor components, and the airflow pathways throughout your home. Each area needs focused attention to guarantee safe, efficient operation.
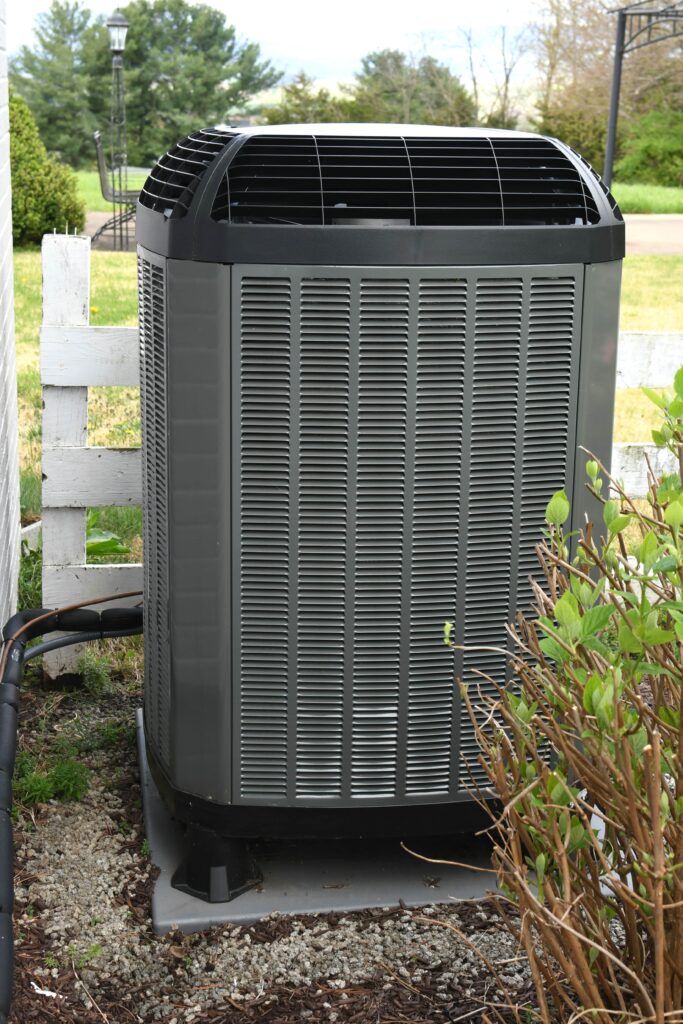
A Complete Outdoor Unit Inspection Before the First Heat Wave
The outdoor condenser takes the brunt of seasonal weather, from ice storms to spring thunderstorms. Start by clearing leaves, sticks, grass clippings, and any debris from the top and sides of the unit. Trim bushes, vines, and tall grass so at least two feet of clearance surrounds the condenser on every side. Poor airflow around the outdoor unit forces your system to work harder, driving up energy bills and shortening equipment life. Check the fins for bending or damage; gently straighten any that are crushed using a fin comb. Inspect the concrete pad or platform beneath the unit to confirm it sits level and has not shifted during freeze-thaw cycles.
Look closely at the refrigerant lines running from the outdoor unit into your home. The larger suction line should have intact foam insulation along its entire length, with no cracks, gaps, or missing sections. Damaged insulation reduces efficiency and can cause the line to sweat, leading to water damage near your foundation. Check for any visible oil stains or residue on the lines or fittings, which can indicate a refrigerant leak. Gently wiggle the electrical disconnect box mounted near the unit to confirm it is secure and weatherproof. Any rust, corrosion, or exposed wiring needs immediate attention from a licensed technician.
Examine the condenser coil through the outer grille for dirt, cottonwood seeds, or pet hair buildup. A dirty coil acts like a blanket, trapping heat and preventing proper cooling. You can rinse the exterior with a garden hose on a gentle setting, spraying from the inside out if possible. Always turn off power at the disconnect before any cleaning work near the unit. If the coil appears heavily soiled or matted with debris, professional cleaning is the safer option. Need air conditioning service before the heat wave hits? Click here for our air conditioning service.
A Thorough Indoor Unit Inspection Before the First Heat Wave
The indoor portion of your air conditioning system includes the evaporator coil, blower motor, and air handler or furnace cabinet. Start by replacing the air filter with a clean one of the correct size and MERV rating. A clogged filter restricts airflow, causing the evaporator coil to freeze and potentially damaging the compressor. Check the filter monthly during peak cooling season and replace it whenever it looks dirty. Inspect the area around the indoor unit for any signs of water staining, rust, or mold on the cabinet or floor. These warning signs often point to drainage problems that worsen quickly once cooling season begins.
Open the access panel on the air handler if it is easily removable and look at the evaporator coil. A thin layer of dust can usually be removed with a soft brush, but heavy buildup requires professional cleaning. Check the blower compartment for debris, dust bunnies, or any signs of rodent activity from the winter months. Listen for unusual sounds when the blower runs, such as rattling, squealing, or grinding noises. Any of these sounds indicate worn bearings, loose components, or belt problems that need correction before peak season. A smooth, quiet blower means balanced airflow and lower energy consumption.
Locate the condensate drain line and pan beneath the evaporator coil. Pour a cup of distilled white vinegar into the drain line access port to kill algae and prevent clogs. A blocked drain line can cause water to back up, triggering the safety float switch and shutting down your system on the hottest day of the year. Inspect the drain pan for rust, cracks, or standing water. If water is present when the system has not been running recently, you likely have a slow drain that needs clearing. These simple steps prevent most indoor water damage during cooling season.
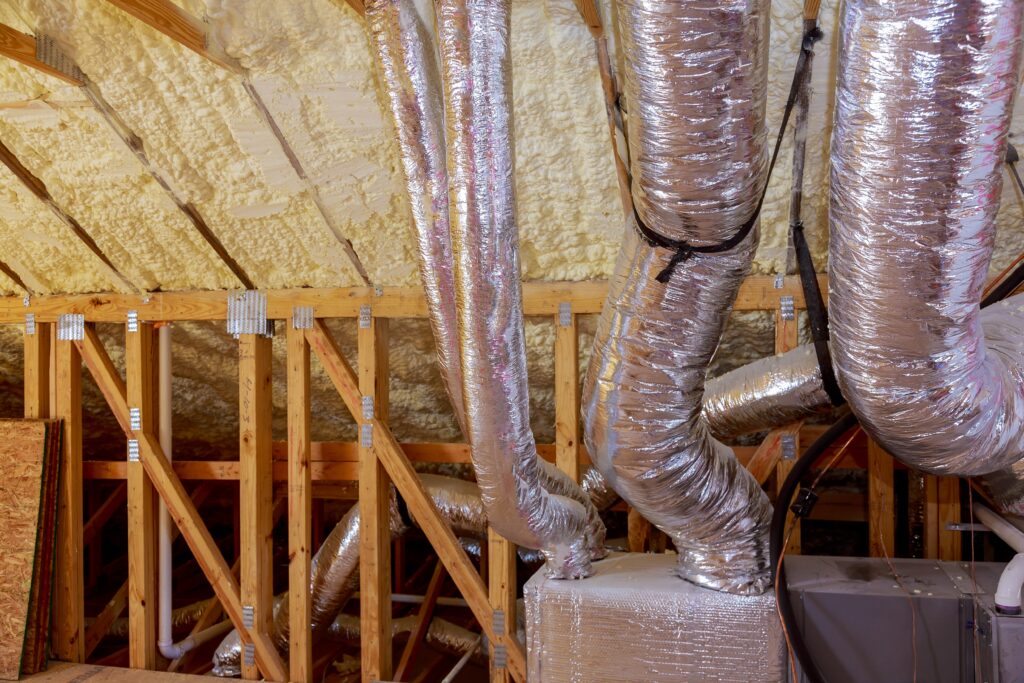
A Detailed Air Duct Inspection Before the First Heat Wave
Your ductwork delivers cooled air throughout your home, and leaks or blockages waste up to 30 percent of your system’s output. Walk through each room and hold your hand near every supply register while the fan runs on the thermostat setting. Weak airflow from certain vents points to blockages, disconnected ducts, or damper issues. Check every return grille for heavy dust buildup, pet hair, or obstructions from furniture placed too close. Return vents need unobstructed airflow to feed the blower properly and maintain balanced pressure in your home. Vacuum the grilles and remove any items blocking them.
In unconditioned spaces like attics, crawl spaces, and basements, visually inspect exposed ductwork for obvious problems. Look for disconnected sections, crushed flex duct, torn insulation, or visible tears in the metal seams. Feel along the duct surfaces with the system running to detect air escaping from joints or gaps. Any air you feel leaking into an attic or crawl space is conditioned air you paid to cool. Mastic sealant or metal-backed tape can patch small leaks, but significant damage requires professional repair. Damaged duct insulation also lets heat into your cool air before it reaches the rooms.
Pay attention to the boots where ducts connect to each register and grille. These connection points often develop leaks over time as the house settles and materials expand and contract. Check that each register damper opens and closes smoothly without binding or falling out of position. Bedroom doors should have at least one inch of clearance at the bottom to allow return air to flow properly when doors are closed. Restricted return airflow stresses the blower motor and reduces cooling effectiveness throughout the home. Want to know more about our duct services? Click here for our air ducts service.
How to Test Your Air Conditioner Before the First Heat Wave
Running your air conditioner on a mild day gives you the chance to catch problems before a 95-degree afternoon overwhelms a struggling system. A test run under moderate conditions reveals weak cooling, odd noises, and thermostat issues while outdoor temperatures remain manageable. Pick a day when outdoor temperatures reach at least 65 degrees, since running the system in colder weather can damage the compressor. This preseason test should last at least 15 to 20 minutes to allow the system to reach steady operation. Taking notes on what you observe helps you describe issues accurately if you need to call a technician.
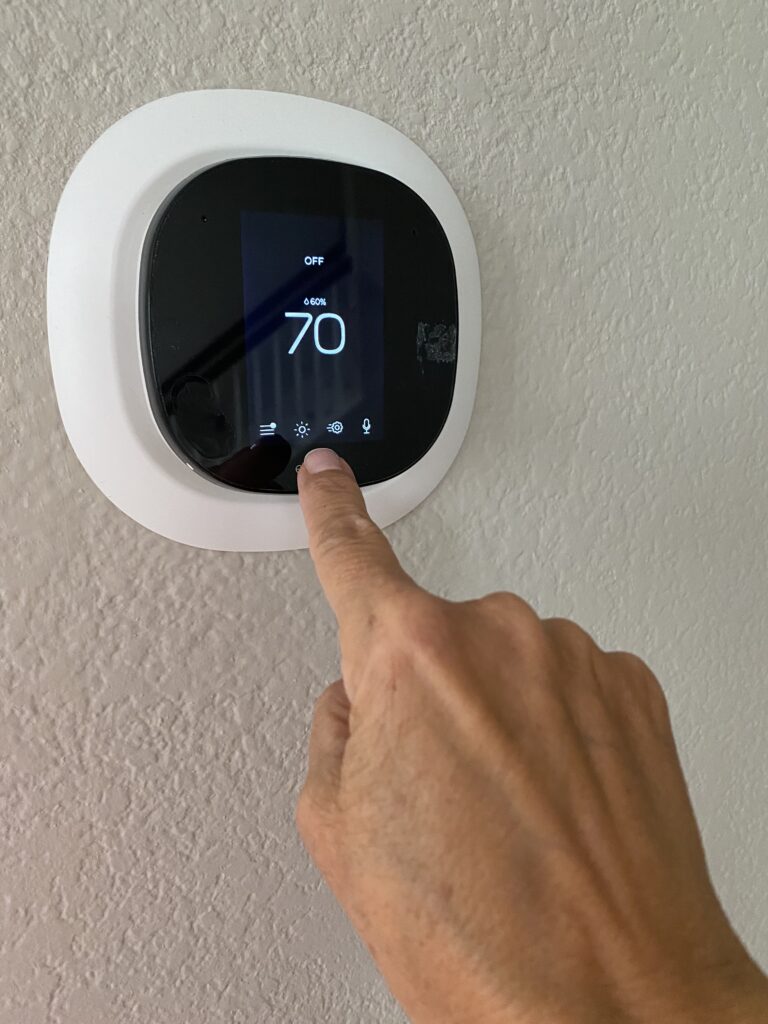
A Smart Thermostat Test Before the First Heat Wave
Start at the thermostat by confirming it has fresh batteries if it is battery powered. Switch the system to cool mode and set the target temperature at least five degrees below the current indoor temperature. Listen for the click of the thermostat signaling the system and then the sound of the outdoor unit starting within a minute or two. If nothing happens at the thermostat or the outdoor unit, you may have a wiring issue, a tripped breaker, or a failed contactor. Check your electrical panel first before assuming the worst about the equipment. A simple reset at the panel sometimes restores normal operation.
Test the fan setting separately by switching from auto to on at the thermostat. The indoor blower should run continuously regardless of whether cooling is active. This test confirms your blower motor and control wiring work properly. If the fan runs on auto but not on the constant setting, the thermostat or fan relay may have a problem. Smart thermostats also need updated firmware, active internet connection, and correct scheduling to work as intended. Review the settings and confirm the schedule matches your actual routine before the busy season.
Check thermostat accuracy using a separate thermometer placed nearby. Small temperature differences are normal, but readings off by more than two or three degrees suggest calibration issues. An inaccurate thermostat causes uneven comfort and unnecessary cycling that wastes energy. Older mechanical thermostats drift over time and often need replacement after 10 to 15 years. A modern programmable or smart thermostat can cut cooling costs by 10 percent or more through better scheduling. Click here for our thermostat service to upgrade or repair your unit.
A Proper Cooling Performance Test Before the First Heat Wave
Once the system runs for 15 minutes, measure the temperature of the air coming from a supply register close to the air handler. Use an inexpensive digital thermometer placed directly in the airflow. Then measure the temperature of the air entering a nearby return grille. A properly working air conditioner produces supply air that is 16 to 22 degrees cooler than the return air. A smaller temperature split often means low refrigerant, a dirty coil, or airflow restrictions. A larger split can signal reduced airflow from a clogged filter or blower problem.
Walk through your home while the system runs and note any rooms that feel warmer than others. Temperature variations of more than three degrees between rooms often point to duct issues, register imbalances, or undersized equipment for the space. Pay attention to humidity levels as well, since a healthy air conditioner also removes moisture from the air. If your home feels clammy despite the cold air, the system may be short cycling or oversized for the load. Persistent humidity problems often require professional diagnosis to correct properly. Humid indoor air feels warmer than dry air at the same temperature.
Listen carefully during the test for any unusual sounds from the outdoor unit or indoor equipment. Humming, grinding, clicking, or rattling sounds indicate mechanical problems that will worsen under heavy summer load. Watch the outdoor unit for at least one full cooling cycle to confirm smooth starts and stops. The fan should spin freely, and the compressor should run without labored sounds. Any hesitation, repeated start attempts, or loud vibrations need professional attention. Catching these warning signs now prevents breakdowns during extreme heat.
A Full Airflow Test Before the First Heat Wave
Proper airflow is critical for efficient cooling, and imbalances cause both comfort problems and equipment damage. Visit every supply register with a piece of tissue paper or a light ribbon and observe how strongly air moves from each one. Weak or absent airflow from specific registers indicates blocked ducts, closed dampers, or disconnected duct sections. Strong airflow from registers close to the unit combined with weak flow at distant registers suggests duct leakage along the way. Mapping your home’s airflow identifies priority areas for ductwork repair or adjustment.
Check that all dampers are fully open at the main trunk line and at individual branch ducts. Some homes have zone dampers that should open and close based on thermostat demand. Manual dampers sometimes get bumped closed during storage season or attic activity. Open any filter grille dampers that may have been closed for winter. Return filter grilles need a clear path to the blower to maintain system pressure. Restricted airflow in the return side is often overlooked but causes as many problems as restricted supply airflow.
Feel the temperature difference between the first foot of supply duct coming off the air handler and a section of duct further along the run. Large temperature differences between duct locations mean the ducts are losing cooling capacity to unconditioned spaces. Insulation wraps should cover all ductwork in attics, crawl spaces, and unheated basements. Check that each run is sealed at every joint and connection point. Properly sealed and insulated ducts dramatically improve efficiency and comfort throughout your home. Spending time on airflow pays back in lower energy bills and longer equipment life.
Why You Need a Professional Tune Up Before the First Heat Wave
Homeowner inspections catch many problems, but licensed HVAC technicians have the training, tools, and experience to identify issues you cannot see. A professional tune-up includes refrigerant checks, electrical testing, and precise measurements that require specialized equipment. The small cost of annual maintenance prevents expensive repairs and extends the service life of your equipment by years. Most manufacturer warranties also require documented annual maintenance to remain valid. Scheduling service in April or May means shorter wait times and flexible appointment options. Waiting until July puts you in line behind hundreds of emergency calls.
A Complete Professional Tune Up Before the First Heat Wave
A thorough professional tune-up starts with electrical testing of every component in the system. Technicians measure voltage and amperage at the compressor, fan motors, and capacitors to identify weakening parts before they fail. Capacitors are among the most common failure points and rarely show symptoms until they quit completely. Replacing a weak capacitor during a tune-up costs a fraction of an emergency summer service call. Technicians also tighten electrical connections that loosen over time from heat and vibration. Loose connections cause arcing, which damages components and creates fire risk.
Refrigerant pressure testing tells the technician exactly how well your system performs. Low refrigerant reduces cooling capacity, causes the compressor to overheat, and indicates a leak somewhere in the system. Refrigerant does not get used up during normal operation, so low levels always mean a leak. A professional will locate and repair leaks rather than simply adding refrigerant as a temporary fix. Proper refrigerant charge is critical for efficiency and longevity of the compressor. Correct pressure also protects the system from freezing during humid conditions.
Coil cleaning, blower inspection, and drain line clearing round out a complete tune-up. Professional coil cleaning uses specialized chemicals and equipment that safely remove deep buildup without damaging delicate fins. Blower wheels collect dust over years of operation, reducing airflow even with a clean filter in place. Clean blower wheels deliver up to 20 percent more airflow, improving comfort and efficiency. Technicians also verify that safety switches and controls work correctly so your system protects itself from damaging conditions. Every detail checked during a tune-up translates to reliability when you need it most.
A Reliable Air Conditioner Repair Before the First Heat Wave
If your preseason inspection reveals problems, addressing them in spring avoids the chaos of summer breakdowns. Common spring repairs include capacitor replacement, contactor replacement, refrigerant leak repair, and drain line clearing. These issues tend to appear as systems come out of winter storage and face the stress of restarting. Spring technicians have more availability for detailed diagnostic work compared to peak summer months. Repairs completed early give your system time for a proper test run before extreme heat arrives. Early repairs also prevent secondary damage that compounds when a struggling system runs under heavy load.
Ignoring small problems almost always leads to larger, more expensive repairs later. A weak capacitor allows the compressor to strain during startup, shortening its lifespan significantly. A slow refrigerant leak grows over time, eventually causing the compressor to overheat and fail. Drain line clogs cause water damage to ceilings and floors when the system runs during humid weather. Each of these failures costs far more to repair than the original issue would have. Proactive repairs save money and protect your home from damage.
Professional technicians also provide honest evaluations of older systems approaching the end of their service life. Air conditioners typically last 12 to 17 years with proper maintenance, and efficiency drops significantly in the final years. Replacing an aging system before it fails avoids emergency installation costs and lets you shop for the best equipment. Modern high-efficiency units can cut cooling costs by 30 percent or more compared to older models. A spring inspection gives you time to make informed decisions without pressure. Smart planning turns a potential crisis into a calm upgrade.
Why Choose DC Electrical HVAC Plumbing for Air Conditioner Service
DC Electrical HVAC Plumbing proudly serves Lawrence, Topeka, Overland Park, Lecompton, and surrounding Kansas communities with honest, skilled service. Our technicians hold OSHA 80 and EPA certifications, and we arrive with no sales pressure and straightforward diagnostics. We offer free estimates on service and installation, along with financing options for HVAC, electrical, and plumbing work. Every technician treats your home with respect and explains findings in plain language you can understand. We stand behind our work and back every service with our commitment to stellar customer care.
Our 24/7 emergency service means you always have a trusted partner when your cooling system fails unexpectedly. We handle every trade in-house, including HVAC, electrical, plumbing, and refrigeration, saving you the headache of coordinating multiple contractors. Our technicians respect your time with on-schedule arrivals and efficient, thorough work. We also document every visit so you have complete records for warranty purposes. Our customers across Kansas trust us because we deliver what we promise every single call. Word-of-mouth referrals drive our business because we earn trust one service at a time.
Preparing your air conditioner for the first heat wave protects your family, your comfort, and your wallet. Schedule your preseason tune-up today and enjoy peace of mind all summer long. Our friendly team at DC Electrical HVAC Plumbing is ready to answer your questions and book your appointment. Call us at (785) 596-3963 or email info@justcalldc.com to get started. Visit us at 1856 E 600th Road in Lecompton, KS, or reach out online anytime. Stay cool this summer with a system you can trust.